
Get the Data Out
I bet is safe to say at some point in time you were asked to extract coordinates from a symbol on a map. In the older releases of AutoCAD we would use the list command, ID, or even a lisp file to get the data we need. In AutoCAD 2014 you can use the data extraction wizard to extract all types of data from objects within your drawing file. Open up any drawing which contains objects or data you wish to extract. For our example we are going to use an existing map with 3 blocks representing monitoring wells placed at different locations and elevations as shown in Figure 1.
Figure 1: Base Map with Boring Locations

On the Ribbon move over to the Insert tab then across to the Linking and ExtractionTable as shown in Figure 2.
Figure 2: Linking and Extraction

After selecting the button the next steps will take us through the data extraction wizard. If you have not used this take the time to get to know how this works. You can extracts all sorts of information from any object contained within your drawing file. Step 1 is to create the extraction.
Step 1: Create the Extraction File
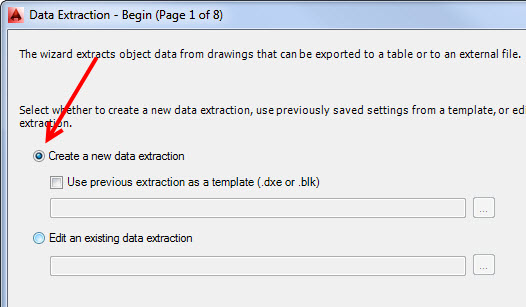
You will need to create the data extraction file (.dxe). Place this file in the project folder along with your drawing file or if preferred in a folder named data extraction as shown below.

Now that we have our extraction file created we have to select the items which we need to collect information from. In Step 2 we can select the entire drawing and/or sheet set or select the button as shown to pick the objects.
Step 2: Define the Data Source

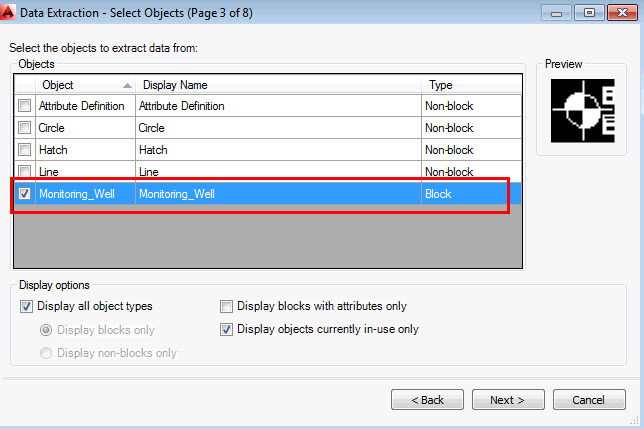
After selecting the 3 monitoring wells (blocks) we are presented with Step 3 asking us what data do we want to extract from those 3 objects. At this point we want to uncheck everything except for our block as shown below.
Step 3: Select the Objects
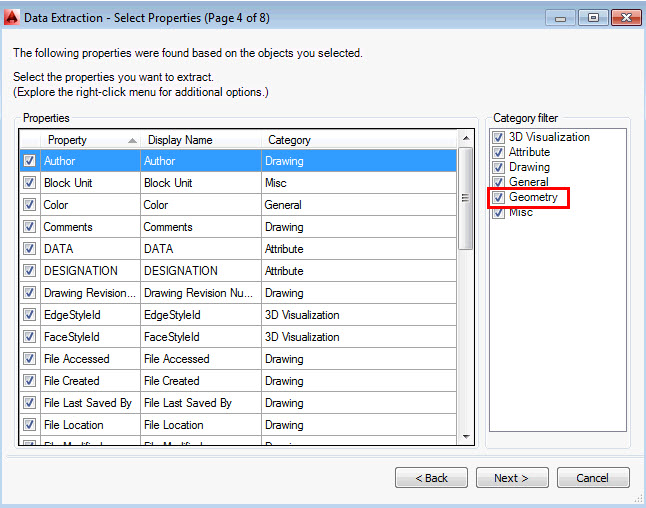
After selecting the data we need (monitoring well block) we then hit next. Take a look at all the data we can extract as shown in Step 4. Select (on the right below) what we want to extract from our blocks. In this exercise we want the X,Y,Z and the attribute name (i.e. MW-01). Take time to scroll down and look at all of the options available to extract.
Step 4: Select the Properties
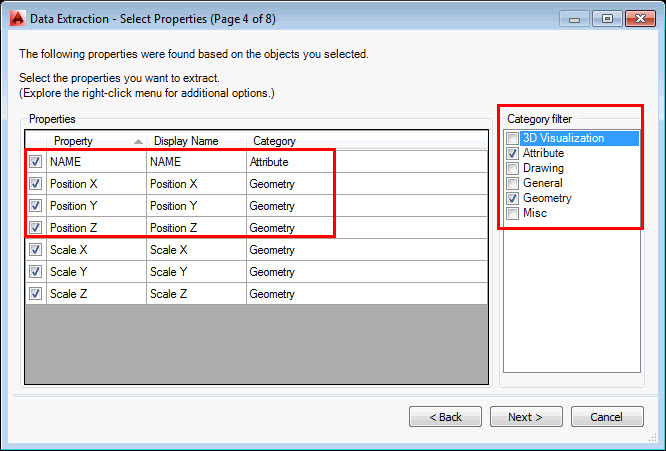
Remaining on Step 4 we are going to uncheck everything in the Category filter (right below) except for the geomoety and the attribute. We need the coordinates as well as the name of our well.
Now that we have defined what we need we hit next and you will be presented with Step 5 to refine the Data. Notice how you have a table with all of the items you have selected and defined within your drawing file. At this Step you can remove the Count and Name columns by unchecking those as shown below.
Step 5: Refine the Data

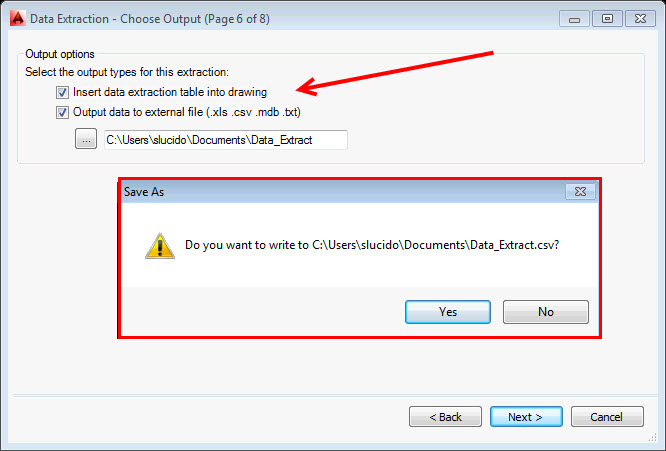
We are almost done. Step 6 gives us the option of putting the data in a table on the existing drawing or outputting to several formats including Excel and Access. You can have both checked as I have and AutoCAD will write the data file and also place the table within your drawing. Step 6 shows us the dialog box that pops up asking the user if we want to write the data to a file.
Step 6: Choose your Output
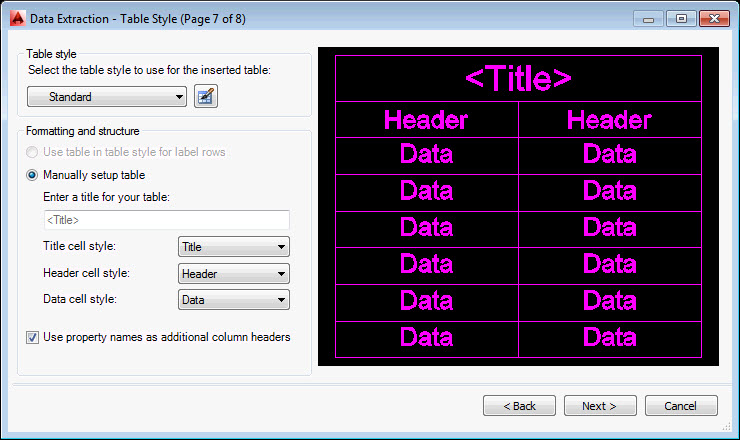
The file has been saved to our folder and table style dialog box pops up. If you extract data frequently you could setup a table style to assign to this task each time you get coordinates for wells. For this example we are just going to choose the standard table style.
Step 7: The Table Style
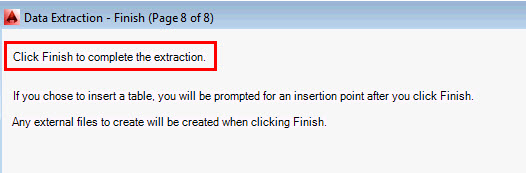
Almost done, Step 8 has us select the finish button and then we will be asked where to place the table within our drawing file.
Step 8: Finish the job
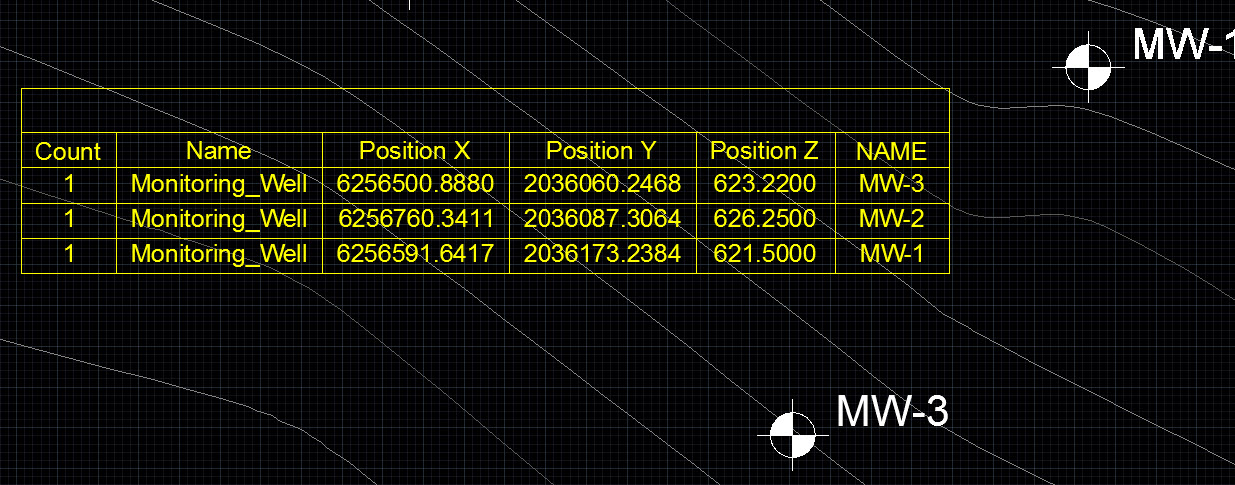
The last image is our original base map with table as inserted next to our monitoring wells.
Figure 3: The Final Output
This wizard or tool is extremely powerful and useful with AutoCAD. Many people are not aware that you can extract data from objects and rely on third party software or apps to get the job done. Use the tools you have to be more efficient and producive and you will be recognized as that go to person in your office.