
Put a Mask on that Symbol
Have you ever moved a block attribute (text) around to an area that is open and you have no lines or objects crossing the text? I bet some of you have even trimmed the area to the block or created a wipeout to mask out behind the text and/or the symbol. There is a solution. We want to take one of our standard symbols and create a new block. We are going to use a standard boring symbol location as shown below. Make sure this object is exploded as we are going to create a block.
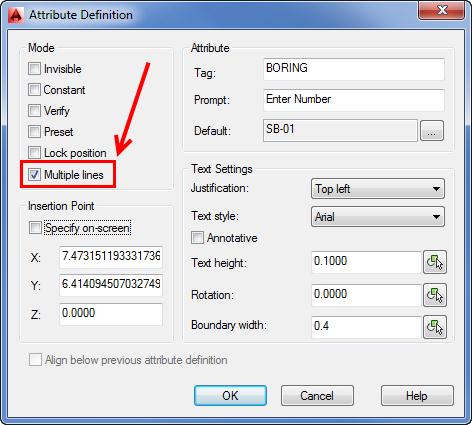
Next we are going to create an attribute but this time we are going to check the box for multiline text as shown in Figure 1. Type ATTDEF at the command prompt and enter the data as shown below. Note: we are not going to click the annotative button for this example. Yes, you can do that but we need to start with the basic symbol to see how the mask works.
Figure 1: Attibute Definition Dialog Box
Your geometry should look like what is shown in Figure 2. Double-click the attribute (text) and then click the ellipsis (…) as shown. You will now be taken to the text formatting editor.
Figure 2: Edit Attribute Definition

Right-click on the attribute (text) and select background mask from the menu as shown in Figure 3.
Figure 3: Background Mask

Apply a background mask and select Use drawing backgrond color as shown in Figure 4. Of course you can select an alternate color if that is preferred.
Figure 4: Apply the Mask

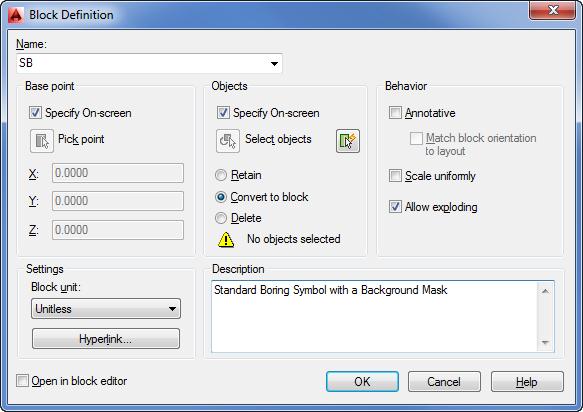
Almost done. Complete the symbol by typing the block command to create your new block. Enter the name SB and select all of the objects on the screen and use the base point as the center of your symbol. Figure 5 illustrates how to name and add a description to the block.
Figure 5: Create the Block
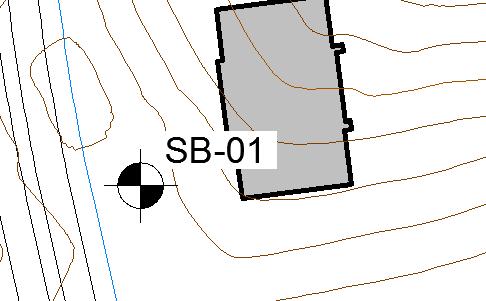
You have now created a block with a multiline text attribute that has a background mask as shown in Figure 6. Note: as with multi-line text you need to check the mtext width, the background mask will be applied to the entire width of the text (attribute). Adjust that accordingly in your design to produce an effective looking scenario. Remember, create a new symbol and check the annotative button for the same properties to be developed with an annotative block.
Figure 6: Test your new block
Video added to include a ScreenCast from Autodesk
https://screencast.autodesk.com/Embed/Timeline/bf84d275-b716-42f1-bf14-258776c2113f
Yes, after entering MTEXT – look at the properties window and you will see a filed that has text frame.
Add the frame and it will be applied to your text – adjust the background mask to fit the frame.
Is it possible to add a text frame in addition to masking?
Thank you! I appreciate the correction and will take care of that.
Not trying to be picky, but the (…) symbol as mentioned in relation to Figure 2 is not an ampersand (&) but an Ellipsis. Otherwise, a very useful tip!